Decks & Presets
July 8, 2020
Remapt

By default, the Engine keeps only one set of input mappings. If a user changes a mapping (for example, by changing the Jump event from Spacebar to Shift), that change is permanent. There is no way to revert to the default mapping.
Similarly, every user on a device (think consoles) must use the same set of mappings. If one person changes a mapping, everyone in the local party will be stuck with the change. And in the context of action RPGs (like League of Legends or Overwatch), you would have to tweak your mappings every time you play a new character.
Remapt solves these problems by using mapping loadouts (called Decks).
Decks
A Deck is a set of inputs. It contains a list of every named input event defined in your Project Settings (both Actions and Axes) and allows you to specify an arbitrary number of mappings for each input event (e.g. Jump mapped to Spacebar on PC and X on PS4).
Uncapped Deck and Mapping Count
The developer/end user can define an infinite number of Decks, and an infinite number of mappings for each input event in a Deck.
Pre-Defined Named Events Only
Remapt only supports pre-defined input events, i.e. those defined by the developer. For example, it would not allow a user to create a CustomInput event that the developer had not already defined.
Active Deck
While you can define as many Decks as you like, a player can only use one Deck at a time (the Active Deck). If LiveSync is enabled (in Project Settings), any runtime changes to the Active Deck will automatically go live to the player.
An Active Deck will be assigned to a player on game start. However, you can change the Active Deck at runtime.
Derivation
Any Deck can be duplicated and then tweaked.
Categorization and Tagging
Modern games, which can have tens or even hundreds of inputs, will frequently categorize inputs. Remapt allows you to categorize and tag your inputs using a DataTable called MappingDetails. The MappingDetails table can be found in the Remapt plugin's content folder.
If you can't see this folder right away, go to your Content Browser, click the
View Optionsdropup, and make sure thatShow Plugin Contentis checked.
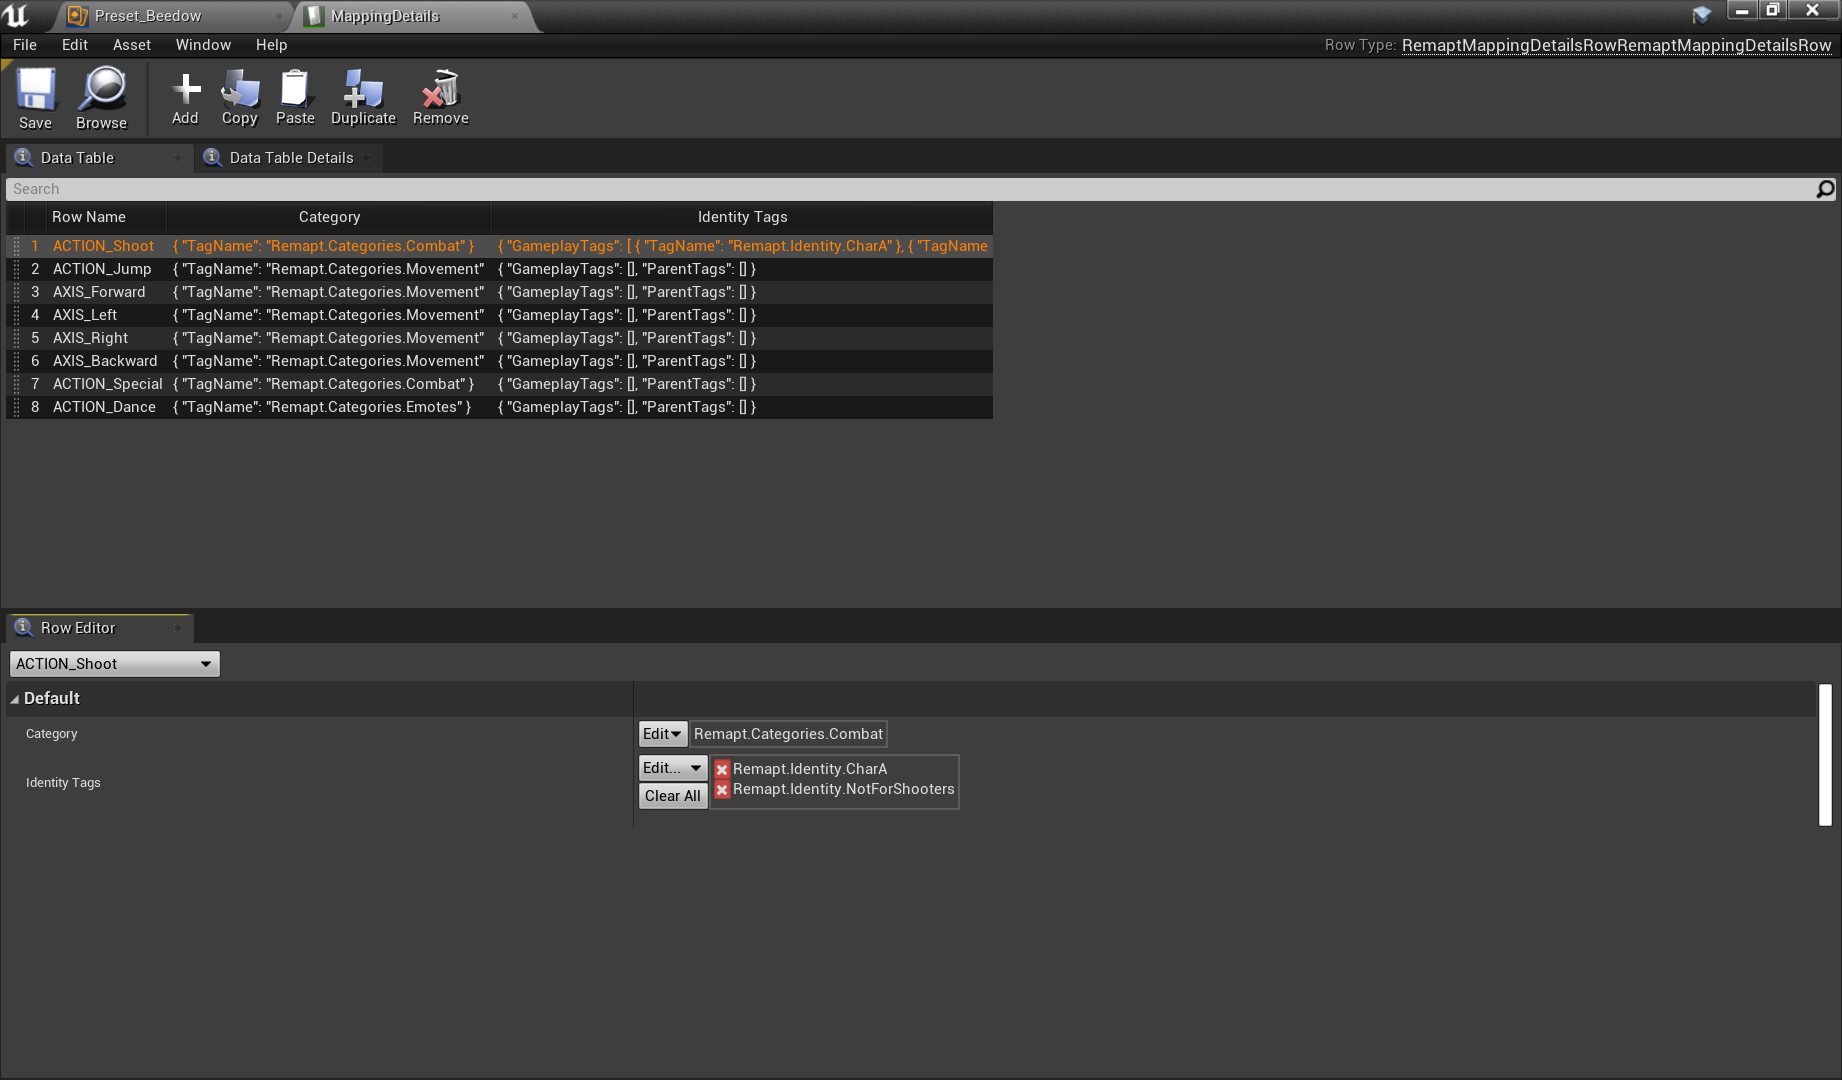
Both categories and identifiers are simple Gameplay Tags. They should stick to the following format:
- Category -
Remapt.Categories.{YourCategory} - Identifier -
Remapt.Identity.{YourIdentifier}
These categories can be queried at runtime to give end users a more organized interface. In addition, the identifiers can be queried to, for instance, show certain mappings only for specific characters.
Presets
While it is great to allow your users to define their own Decks, you may want to give them some to start with. These Decks are called Presets and they come with their own Editor.

Using the Preset Editor, you can design a set of mappings that is suited for a particular purpose (such as for a particular character).
After defining a Preset, make sure to add it to the list of Presets in Project Settings.
Deck Details
Presets can also make use of Deck Details. This is any additional information that you want to provide for your Preset, like a name, a description, an icon, or a hero that it applies to.
Simply define a Deck Details asset and add any variables you want - be sure to make them instance editable. Then use that set of Deck Details in your Preset and fill out the information as you see fit.


